Thursday, August 23, 2012

Vintage personalized mini suitcases

So my hubs and I decided to take charge and be in charge of the cast gifts for the production team for the show we recently were in. Every show we are in, the cast gets something for the people who helped make the show amazing.
Since our "theme" for the show was incorporating suitcases in every nook and cranny, I decided to make these little vintage-style personalized mini suitcases.


Honestly I started out painting "The Music Man" on the one suitcase, and quickly realized that it was going to take way too long to do it on all- that and my handwriting/painting isn't very good. So I decided that one and only suitcase would go to the one lady who actually painted all the awesome signage and set of the show.
For our director I altered an even larger suitcase, which I filled with goodies and put one of the small ones inside. For some involved we gave them luggage tags inside the mini suitcases. All of them got kazoos in their suitcases- the smallest "instrument" we could find to put in them. :D I also used many different kinds of ribbon on these, but all had some sort of "stitching" on each.


They turned out cute, however as we were handing them out, some of the ribbon was coming off of them- after they were sitting in my extremely hot car all day. I really need to invest in a good ribbon/chipboard adhesive- since a similar thing happened with the altered photo frame i gave to my friend for her bridal shower- the heat made the letters pop right off! Eek!


I was proud how they turned out. I even got the hubs involved in the process- he spray painted all the mini suitcases for me when I was at work (after he took off all the metal closures, he painted them, then put all the closures back on in one night). It was nice to sorta work on a project together. hehe


So the process for these were:

  1. take off metal closure, spray paint brown, screw metal closures back on
  2. stamp in stayz-on ink travel-themed vintage type stamps all over mini suitcase
  3. adhere ribbon to edges
  4. with white gel pen add faux stitching
  5. add personalized name to suitcase with thicker letters
  6. stamp, glue, punch hole, then attach with baker's twine the thank you tag to the handle


I hope (or think it was at least) a good successful project. :D
Currently I'm finishing up some work on a co-worker's bridal shower invites, then working on her passport-themed invites after that. I do love working on wedding stuff so much more than other design work.
Anyways, Enjoy!
-M

Tuesday, August 14, 2012

Beauty and the Beast Bridal Shower show off

Ok. So I finally have some time to show off pictures from my friend's bridal shower that I helped throw. We decided to do a Beauty and the Beast/Parisian themed shower.
So, here are some pics from the shower itself and all the stuff I helped make for it! (FINALLY I can show it off!)

 (The bride-to-be is 3rd from left in the purple, I'm on the far right. The rest are the other bridesmaids/maid of honor in black, matron of honor at left)

 (the bride sitting under the "Bride to be" banner)

 We decided to have every guest bring a brooch, so we can make the bride a brooch bouquet for the rehearsal dinner. This is the sign on the table.

 I love that we decided to do this. The maid of honor found these cool wine glasses, and when flipped over with flower inside and a candle on top, it is perfect for a candle holder!

 The banner I made for the bride-to-be.

 Every guest got a unique teacup and a seed packet to take home.

 The first thing you saw when you walked into the home for the shower- the Beauty and the Beast themed table.

 Cupcakes sitting among the favors.

 More teacup favors.

 Full view of the Beauty and the Beast entrance table.

 At the kitchen island bar.

 Drink flags I made for specifically to go with the specialty drinks made by the bride's sister.

 All the brooches that everyone brought for the brooch bouquet.

 This was the poem/explainer everyone got with their shower invite.

 Drinks and little flags.

 The full spread of goodies- using my homemade cakestands galore!

 Bride-to-be opening my gift envelope (made with a lace Dollie.)

 The banner.

The cupcakes- only slight change- no Lemon Meringue was made, instead Dulche de Leche was made- believe me, I didn't mind the change at all!

 One side of the drink flags.

 Backside of the drink flags.

 Seed packet thank yous.


 The shower invites I designed. (I whited out some of the information)

 About the brooch bouquet- this was sent with the invite.

 These were also sent with the invites- everyone who brought a brooch could bring them with these attached.

 My lame attempt at making a "rose in a jar"/ beauty and the beast-esque snow globe.

 Most amazing nut/cheese/apricot things.

 The bride-to-be and me, with the framed art thing I made for her.

 Dulche de leche cupcakes. yes please!

 more food.

 (me in my red dress.)

 Vanillabean cupcakes!

 My fun headband.

And another shot of the banner after I put it together.

Sorry these are not in any particular order- there was so many pictures I kind of had to just weed through them all! This was all a surprise to the bride-to-be, so it took all my will-power not to post all the fun projects I had been working on before the shower.
Enjoy!
-M

Friday, August 3, 2012

CHA recap

Ok. So I apologize for being so bad at blogging. I know I say it all the time, but blogging really is a job onto of a job! Anyways, here is basically a recap of my trip out to Chicago for the summer 2012 Craft and Hobby Association Conference.
I went this year with my mom, who runs a mobile art business, Geiser-Weaver Associates, LLC, and also sells custom doll clothes on Etsy. I mostly went to promote my digital image store, Frenzified, as well as my graphic design work and blog.
So here is my trip via photos (mostly instagrammed) with some commentary in the middle. Enjoy.

Sunday- Traveling to Chicago via airplane

 (while at the airport, had a large glass of water to get me going...was soooo early!)

 (breakfast at airport)

 (once arrived, headed to convention center to pick up my badge!)

 (lunch at steak restaurant across from the convention center- soup!)


Monday- Day 1 at CHA, Educational classes

 (Day 1 of classes, we made this mini album in class by We R Memory Keepers)

 (some of the supplies from the class)

 (Then headed to seminar of building a better blog- learned a lot in this actually)

 (Next class sponsored by Tombow- made tag mini album with all different techniques)

 (supplies from that class)

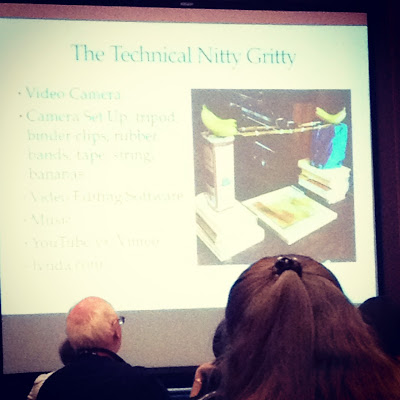
 (Next another seminar- making how-to videos...informative, and funny at parts)

 (the CHA banner!)

 (Lunch/dinner during Day 1 of classes- Monday. We found this restaurant inside one of the hotels across from the convention center, had great bean soup at it!)

 (Final class of the day on Monday- WoW embossing class)

 (supplies from the class)

 (They even gave us each embossing guns to keep!)

 (some demos they did with their products- WoW embossing)


 (This is actually embossed on fabric!)


(We also made these adorable sparkly mustaches in the class. hehe!)

 (this is the mini album we made in the embossing class. It doesn't seem like my style, but I actually really like how it turned out)

(the super cool debossing we learned to do in that class)


Tuesday -Day 2 at CHA, Educational Classes and 1st day of Show Floor being Open 

 (opening ceremonies breakfast)

(everyone waiting to get in!)

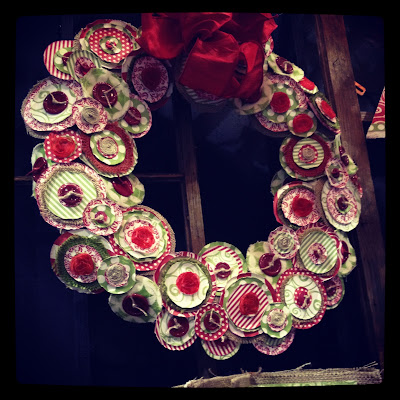
 (Lovely wreath at Canvas Corp. booth)

 (Lily bee design)

 (Thanks to Heidi Swapp's instagram, I was reminded to head to her booth first thing and got the all-access pass. I got an adorable pink bling badge necklace and LOTS of other great goodies just by having the badge!)

 (Little Yellow Bicycle)

(Jillybean Soup)

 (Authentique paper)

 (Authentique Paper)

 (Bling at the Connie Crystal booth)

 (crazy huge setup right when you walk in the show floor at the DCWV booth)

 (They also had this adorable Halloween decor setup in their booth)


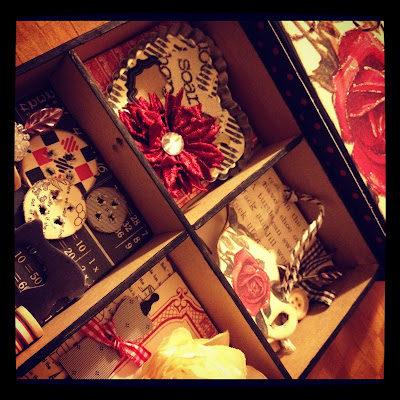
 (Maya Road shadow box class)

 (The full complete shadow box)

 (super cool dress contest)

 (Tim Holtz Stampers Anonymous booth)

(adorable pumpkins at the DCWV booth- I love that sweater one!)


Wednesday- Day 3 CHA, educational classes and 2nd day show floor open

 (waiting to get on show floor)

 (me)

 (My mom)

(One of the first make-and-takes we did was these headbands at the one adhesive booth. They turned out super cute and everyone there was so nice!)

 (lovely layout by My Little Shoebox)

 (yellow and gray! I love that map too by Silhouette)

 (adorable Thanksgiving table setting by SEI)

(Hampton Arts shadowboxes)

 (dinner that night- most amazing food ever- tortellini with chicken stuffed with pesto in cream sauce at italian restaurant a mile or so from our hotel. We got invited by some nice ladies we met in a Make-and-take, and was so awesome!)


Thursday- Day 4 of CHA, last day of show floor open

 (Doodlebug setup)

 (adorable letter make-and-take done by Basic Gray)

 (All packed on last day)

 (Happy Hauntings set by Graphic 45)

 (Yes, my flight was DELAYED to Philly. Was delayed almost 2 hours when it was all said and done)


So that was my trip in a nutshell. We met some great people along the way and made some great contacts. Got some great ideas and overall had a fun time. I got home in time (though my plane was delayed) just in time to see a movie with the hubs. lol
Anyways, off to go to bed before another extremely long day!
Laters.
-M